")
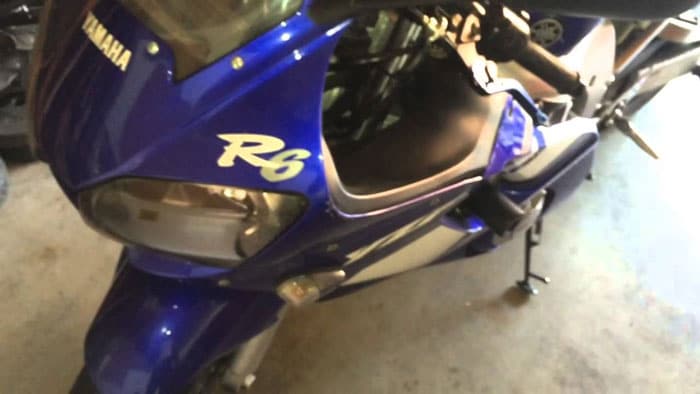
Part One: The Cleaning and Sanding of the Fairings
You don’t just start painting the motorcycle fairings. They are probably grimy, and it’s just not right to paint over the gunk. You must first clean and sand the fairings as prep before you start on the real job: painting.
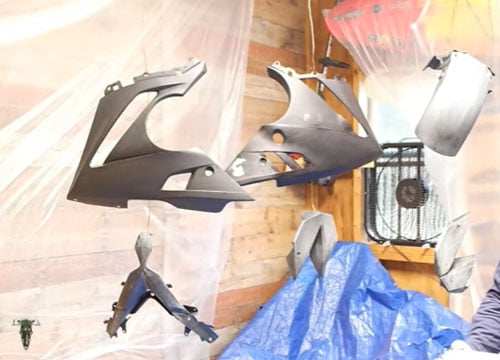
Step 1: Remove the fairings
The first step is to unscrew the bolts that secure the fairings to the bike’s body, then remove the fairings (including the motorcycle fairing speaker)
Place the fairings on an open work space. This will ensure the fumes emanating from the spray paint won’t be too concentrated (when you eventually get to the painting part).
After removal of the fairings, you should cover the bike with a tarp as protection from exposure to the elements.
Step 2: Cleaning the fairings
Over time, the fairings tend to accumulate black engine gunk. You can clean the dirt off the fairings’ surface using soapy water.
All you need is a mixture of hot water and regular dish soap in a bucket. Use a sponge dipped in the soapy water to clean the dirty from the fairings.
Work on the fairings with a circular scrubbing motion to get the best results. Put in extra effort in the areas that have amassed black engine gunk.
After you have finished cleaning and you are satisfied, use clean water to rinse off the soapy water off the fairings.
In case there are decals or stickers on your fairings and they are giving you a pain, wondering how to remove them, here is a neat trick. If you have a hairdryer, apply its heat directly on the stickers and watch them loosen up. The glue loosens up and that enables you to peel the stickers off with ease.
Step 3: Sanding the fairings
You will need sandpaper for this step. If you don’t have any, you can purchase 400-grit sandpaper at your local hardware store – or any store which deals in home improvement supplies.
Use the same circular motion you used with the cleaning sponge, only this time you are doing it with the 400-grit sandpaper. Do this, sanding carefully the entire surface of the fairings.
Don’t be in a hurry, in case you miss some spots in your haste. Don’t be rough or press the sandpaper too hard – easy, moderate pressure will do. You want the fairings’ surface to become as smooth as possible.
The smoother the surface of the fairings, the easier it will be for the primer and then the paint to adhere to the surface.

Step 4: Rinsing
The sanding process causes dust to build up on the surface of the fairings. You can’t paint on a dusty surface.
To get rid of the dust, use a microfiber cloth dipped in water to wipe down the fairings.
After carefully rinsing the fairings, leave them alone for a while to air-dry. Give it about an hour before you come back to start the next step.
Part Two: The Priming and Painting of the Fairings
Step 1: A coat of primer
If you don’t have primer, you can get an aerosol primer at your local paint supply store. The most appropriate one for your fairings is plastic primer.
The aim is to cover the entire surface of the fairing: you want a layer of primer that is smooth and consistent across the entire surface. To accomplish that smoothness and consistency, spray the primer in even strokes and do not stop.
You avoid stopping because you don’t want the primer to leave patches. The entire coat should be consistent.
After you are done applying the primer, give it some time to air-dry. That should take from 3 up to 6 hours.
Step 2: Base color
Spray-paint a thin layer of the base color onto the surface of the fairings. Cover the entire surface in this color, and make sure you don’t miss any spots – the primer should be painted over completely. Remember it’s just a thin coat, though.
After doing that, you should step away for approximately 6 hours, during which the coat of initial paint will dry.
For the sake of safety, you should consider wearing safety goggles and a breathing mask to protect yourself from the harmful fumes that emanate from spray paint. Inhaling those fumes puts you at risk of unpleasant side effects such as nausea, throat irritation, headache, and nose irritation.
Step 3: Wet sanding
Squirt or drip some water on the fairing’s surface. Work on the wet surface with a 1000-grit sandpaper, carefully sanding the surface to smoothness.
After you are done, work on the surface with a microfiber cloth so as to get rid of any grit and ensure the fairing’s surface is utterly dry before you start on the next step: more painting.
Step 4: Second coat of base color
Working in even strokes, apply a second coat of your base color across the surface of the fairing.
Give the paint three hours or more to dry.
Step 5: 3 to 4 more coats
You must repeat the process three to four more times. This technique is referred to as “Grip coats”. The concept: each new coat grips the previously applied coat. In the process, you get a richer and thicker look.
After applying the final coat of paint, you should give it not less than 6 hours to dry.
Step 6: 2 coats of lacquer
Applying clear lacquer to the already painted on fairings gives protection to the paint (from exposure to the elements). Clear lacquer is available at hardware stores that deal in painting supplies.
After spraying the first lacquer coat on the fairing, spread it evenly with microfiber cloth.
Afterward, allow it to dry for 2 hours.
After it has dried, apply a second layer and repeat the process.
Step 7: Drying and reattaching
Give the fairings 24 hours to dry. After they are dry, reattach the fairings to your bike, using the bolts you removed in step one.
Conclusion
Clearly this process needs time. Most of the time is taken up in letting the paint dry. Considering all the layers of paint, that means painting your motorcycle’s fairings will take quite a while. Be patient.
